


Pelecon 2013 Day 2, a set on Flickr.
I went just a little crazy taking photos this year! sorry all, you may wish to approach viewing via the small thumbnail route first The conference dinner coming soon probably in another set, very much enjoyed chatting and sharing the experience of the fish with you all. :)

Friday, 12 April 2013

Wednesday, 10 April 2013
Pelecon 2013 Day 1


Pelecon 2013 Day 1, a set on Flickr.
Photographs from Day 1 of the PELeCON conference are now available for viewing.
Images include setting up and some of the events, interesting features around the venue, and a few of the speakers and delegates.
If you use Flickr yourself, join the PELeCON group to share your own photos. Its free and you retain ownership.
http://www.flickr.com/groups/pelecon/
Monday, 8 April 2013
Canon 550D DSLR video meets external audio - my experiences shared
 |
| Zoom H1 on Canon 550D |
Historically, I've enjoyed dabbling in a bit of filming, but tended to buy separate still and video units (I had no choice in the early days). My experience regarding video includes a brief, but happy go of my parents old Super 8, I later used the very clunky VHS cameras of the late 80's (wow those were big units). However, most of my later work was using more compact 8mm Digital and later MiniDV, which were of Canon variety with reasonable 'acceptable' on-board sound. Essentially, in those days, unless you had a professional budget (thousands of pounds) it was always a make do experience regarding audio.
Enter DSLR with video, hooray!
Now with the advent of Digital SLR with High Definition (HD) video filming capabilities, personally I think that things have changed for the better. It's a great way to spend more on a stills camera and still get high end video recording capabilities, when you need it. Look at the lenses you can put on the front! Granted its always a compromise to a dedicated video camera, but as those that know, DSLRs typically require lugging a lot of heavy equipment (lenses, tripods, battery's etc) around, why would I want to add another film camera to that load? Sorry purists...
I agree there is a heap of functionality on film cameras that you just cant get on DSLRs, but I see this gap reducing every year. Most amateur film people can usually satisfy their needs with DSLR HD capabilities. I'll add that the newer Canon 650D has dedicated lenses with auto-focus built in for video recording specifically, but currently there are mix reviews on the performance and not something I have tested yet. There is also the Canon flagship EOS-1Dc model which can produce 4K video at 24 frames per second, so for those that can afford the hefty price tag, its quite an impressive capability for future proofing footage at cinematic quality!
That hiss can really be annoying...!
As mentioned earlier, sound takes a bit of a back seat (it is still very good compared with yesteryears, but you do need to buy a little more to get the best out of the units). The Canon 550D has a mono microphone (built in), which is not bad for close-up indoor work (particularly vocals), but I prefer a more stereo immersive experience to get the best out of certain shots, particularly for landscapes. What to do...? I've been experimenting with getting good stereo sound on my Canon 550D for a while, and have been trailing the Zoom H1 for over 2 years. It's a very lightweight and convenient way of getting pretty good pro-level stereo audio.
Why the Zoom? When I bought this unit, solutions for stereo recording were rather limited, especially on a budget, particularly if you did not want to add a big heavy item of extra equipment to you camera or bag. So the Zoom fitted nicely. With some DIY custom made attachments for a mounting system, I now find this fits very well on top of the camera using the flash shoe. I don't use sound damping (the microphone suspended in a rubber cage to isolate camera body noise from microphone) as I mainly shoot on a tripod. I also want to be able to take the camera in and out of a camera bag easily with the zoom attached, much more difficult with a large dampening system included. However, I confess it's an extremely difficult technique to master, however, using smooth gentle movements, without bumping or rub your hands over the body of the camera will keep rattles from minimal to non existent (it comes with practice). Using the built in 100Hz cut-off (low-pass filter) will help with the bumps, as will reducing the gain a little, the later is a bit of a 'fudge'. Also, remember to turn of the built in lens anti-shake lens technology on the camera lens, which can make a horrendous noise on the audio - you really don't need it on a tripod.
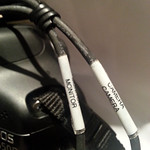 |
| Sescom cables |
The tricky bit is interfacing a headphone out socket, on the Zoom, to a 3.5mm microphone in socket on the Canon 550D. These are different audio level. Fortunately, I did some research, and there is a very handy L-pad available (which saves making your own), it's 25db attenuation cable just for this purpose, made by Sescom. The fiddly part is setting the level output from the Zoom to the input on the camera (make sure the cable is the connected firmly and in the right order - it is marked).
Turn off the cameras automatic gain...
The Canon 550D has built in automatic gain, that just cannot be turned off in stock firmware. This is known as AGC or Automatic Gain Control. The built in microphone, typically, is very happy with this setup, it works very well for closeup indoor work, but once you use an external microphone this can introduce a lot of unintended noise. Essentially the camera electronics ramps up the sensitivity during moments of quiet - and you can say hello to hiss again...
There are many posts and tips on the web including feeding a high frequency noise simultaneously into the jack while recording audio. This tricks the auto gain to back right down. It works, but its not the most elegant - as you need to attach an MP3 player outputting a 20kHz frequency - it also means complicating your ability to capture stereo sound, as you have to use at least one of the channels to introduce the 20Khz signal.
My favorite solution is to use the Magic Lantern firmware, which adds the ability to turn off the auto gain! Thank you Magic Lantern! Of course you use this at your own risk. It is pretty much a tried and test tweak these days (rather than a hack), but I always recommend reading the articles on the site very carefully, before going down this route! It contains a modified firmware (well it is actually minor firmware tweak to allow access to the Magic Lantern software running on your now bootable SD card). It has many other settings that are normally only available on pro level cameras, so it is very desirable for may budding Spielbergs. Some settings work in conjunction with the original Canon menu - the pro level ones are available on the Magic Lantern menu. It's a whole new learning curve. You may also want to wait for your camera to be out of warranty, you have been warned... ;)
Balancing audio
There are three things to consider:
- Setting the sensitivity on the camera (tweaked by Magic Lantern),
- the headphone out on the Zoom
- and the Microphone sensitivity.
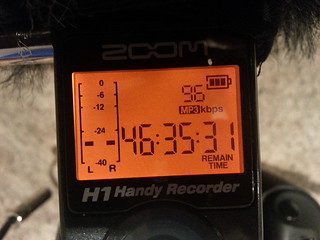 |
| Zoom H1 LCD illuminated |
Record directly to the Zoom
Don't forget that the Zoom can also record audio to its own dedicated SD card, so there is nothing stopping you from recording to both at same time. I usually do both on important recordings just in case I get the levels wrong on the camera. A handy tip - remember the old film clapper boards? - use one of those or even simple clap your hands, so there is a noticeable spike in the audio to match later (wait for the clap echo to fade - then start talking). The advantage of recording audio to the Canon 550D while simultaneously recording to the Zoom is that audio matching and or recovery later is much easier. If you get the audio settings wrong on the Canon input you can still use the audio recorded on the Zoom... This may also be a viable option for those not wanting to use the cable link, and or wishing to mount the Zoom on a tripod closer to the sound source (remember that too much distance with no cable connected will mean there is a slight delay in the clap from camera to microphone making the lip syncing a little more fiddly, in long recording.
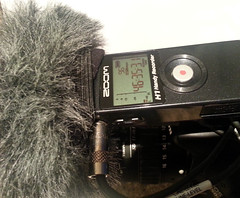 |
| Zoom H1 with record button on top |
Other microphones
If it has a 3.5mm jack, this can be connected directly to the camera. I would use Magic Lantern (a non standard firmware development) to allow adjustment of the gain to match your microphone. You may find that later Canon models have manual controls built in, but the 550D does not. I'm afraid which microphones to go for is very much trial and error. Cheap does not always equate to good sounds, and long cable runs will likely mean noise gets introduced into the camera, you may need to invest in some high quality cables. However, look at the product reviews and see how others have got on with them, if it has a good consumer rating, the chances are you are onto a good buy. Alternatively, speak with an audio professional, or your Learning Technologist for advice.
Enjoy your audio.
Monday, 7 January 2013
In the limelight - could this be you at @Pelecon13 ...?

It's a family affair
The Plymouth Enhanced Learning Conference is often praised for its "warm family atmosphere".
Hosted at Plymouth University, Devon, UK, it attracts learning professionals from across the globe. You'll have the opportunity to explore, discover and discuss new approaches, new technologies and new ideas to enhance, enrich and extend professional practice.
Submit a paper
Pelecon welcomes papers, workshops, panels and symposia in any of the following areas, or associated topics:
- New and emerging learning technologies
- Classroom tools
- New pedagogies, theories and practices
- Mobile and ambient technologies
- Human computer interfaces
- Virtual and personal learning environments
- Social media and social networking
- Digital literacy
- Digital personal identity
- Personalised learning and personal devices
It's all in a single click of an on-line submission form... Abstracts of up to 300 words for paper presentations, workshop sessions and panel discussions. Please indicate the aims of the paper, conference themes and the type of audience at which the paper is aimed.
Pelecon are accepting submissions until Friday 1st February 2013. Successful submissions will be notified by 15th February 2013.
To submit your papers head over to the Pelecon submission page.
Wednesday, 31 October 2012
Free Expression screen video capture software from Microsoft
 I have tested various screen capture products in the past, always looking for the free version. It's a request I often get where an academic requires some form of screen capture in order to incorporate a vodcast as part of their repertoire of teaching materials for the VLE, a virtual learning environment or simply as a video tutorial.
 I have used Adobe Captivate, TechSmith Camtasia Studio (very good) but these are all pay versions. What about free ones? There are those in various guises, some very basic like CamStudio which works well, however, as a user you have to know your video codecs to get the best out of most, and other ones are typically locked down with limitations. One of the better free versions I have come across is kindly provided by Microsoft, called 'Expression 4'.
N.B. those of you running to grab the free software, ensure you go to this download page (avoid the trial versions unless you want the pro version trials...). Please check the system requirements before installing. During installation the free version may ask you for a key, just click past that without entering anything. For Windows 7 PCs, this should work as above, however
Windows XP users 'may also' be promoted to install the .NET Framework 4 in addition to expression (a lengthy task). Ensure that the .NET install file is renamed to include .exe at the end to ensure it runs. .NET takes a while to install, so leave plenty of time. Then reinstall Expression
Windows XP users 'may also' be promoted to install the .NET Framework 4 in addition to expression (a lengthy task). Ensure that the .NET install file is renamed to include .exe at the end to ensure it runs. .NET takes a while to install, so leave plenty of time. Then reinstall Expression
 |
| Capture interface |
The main limitation for the free version appears to be the 10min capture limit. Personally I don't think that is bad at all, as it gives most people time to take a breath and record a new section, each segment can be assembled together later. The Capture interface provides: microphone on/off, main volume control, webcam (if you have one), settings, your previous capture list, and of course the record (as shown above). When selecting the record option you are presented with an area to capture, either full screen or custom.
 |
| Choose the audio you want to capture! |
Fortunately the encoder also works on Windows XP (at the time of writing this post) However - I'm not sure how good it will fair on older systems? ...You may wish to try it and see...
To add to this arsenal of tools, I must not forget the excellent free Windows Live Movie Maker (Windows 7 and greater), which all adds up to some pretty powerful tools for editing an creating professional teaching and learning videos. Output your screen videos from Expression as WMV, you can then easily drop them straight into Movie Maker timeline, add titles, streamline and then upload straight to your YouTube. Of course it also has options to create stand alone WMV or even produce your own DVD if you want to go the whole hog.
Happy editing :)
Happy editing :)
Tuesday, 14 August 2012
Recording environments and microphones
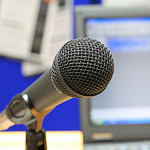
A few considerations:
- Get a good microphone Don't be a cheapskate on this one... else you could spend hours of your time on re-recordings - Ill provide some more details on why later in this post.
- Invest in an anti-pop filter - this gets rid of the 'puffing' sound, caused by wind movement when very close to the microphone. A decent 6 inch one will only set you back around £12+ always check the reviews.
- Be consistent with your environment - different rooms will have different sound reflections - for example rooms that have more carpet are less likely to echo. Get into the habit of positioning the microphone at the same distance from your mouth. There is also a lot of noise coming from PC cooling fans, if you have a window open (next to a busy road) or noisy corridor, its often difficult to escape. Find a quiet place or even invest in a portable sound booth, build your own or if you have a big budget, go for a Vocal Booth (which is a self contained unit with audio damping). Yes, I know they look silly, but it helps cut out the background noise behind the microphone. It really boils down to how seriously you take your audio.
- Monitor, USB mouse and Keyboard extension cables - I don't hear this mentioned often, but if you want to keep the computer noise at bay, why not get some 3-4 metre extension cables for the PC - maybe a separate monitor if you are using a laptop. This allows you to place the microphone far enough away from noisy computer fans. (Typical PC setups will require a Monitor extension cable - a USB cable for the keyboard and and USB cable for the mouse - check the monitor plugs for the types you need.) - N.B. extending the length of your microphone lead will introduce noise - ensure you choose high quality cabling. If it reaches with the standard length it's probably best to stick with that!
What is a decent microphone?
 |
| Pop filter - they're big but work well! |
- On-board sound card using standard (3.5mm plug) microphones - you may find that your sound card is not up to the job. It is probably capable of fairly good sound, but can lack detail if using cheap microphones (N.B. the pros use XLR connectivity for best sound which is lacking on all standard PCs!), depending on your operating system, you also may have a battle with software volume controls and microphone boosts to get it sounding reasonable.
- USB microphones - these have their own built in sound cards - typically manufacturers have developed them to compensate for noise introduced via cables etc. Be careful, as not all of these are up to the quality you may expect.
- Lapel microphones, you are looking at a lot of money to get professional quality sound - its a trial an error game for the cheaper ones.
- Mixing benches (lots of knobs and dials) - these are good if you have multiple microphone set-ups allowing users to blend sounds (and provide pre amplification for professional microphones). However you have to ensure that you have a relatively noise free USB audio adaptor to introduce clean digitised audio into your PC, or else all the benefits you get from the microphone are lost in noise introduce at the final stages. Top end sound cards with XLR plugs may work but they are expensive and can add extra levels of complexity. Most people just want to plug in and record with out the trouble of multiple knobs and sliders to contend with.
- Omnidirectional or Unidirectional (loosely speaking 'Cardioid') microphones? Which ones? Omnidirectional picks up sound from every direction, whereas Unidirectional only records from one direction (the front of the microphone, typically). Omnidirectional tend to be more sensitive and you can expect ambient noise to be collected in huge quantities, whereas most unidirectional have the specific directional properties and are typically only usable between 4-10 inches from the mouth. Because of a lack of sensitivity behind the microphones (particularly Cardioid) they are less likely to pick up external noise directly behind them (N.B. using them the wrong way round makes them sound muffled). Unidirectional (Cardioid) are likely to be the best ones for use in office spaces with a decent sound booth. Further details on the various types of microphones available on wikipedia - its vast - only if you're interested!
JISCDigital Media have a cracking article on USB microphones, with some setting up guides, worth a look. Here are the key facts:
·
The microphone connects to
the computer USB port
·
Consistent sound across
different systems
·
Plug and Play installation
·
Many USB mics have a
headphone jack for monitoring
·
Many USB mics are optimised
for voice
‘…In many cases settings are chosen
with a particular use in mind, and many are optimised for voice recording. If
your intended use is compatible with this preset factory set-up, a USB
microphone can save you a lot of the time and knowledge needed for correct
set-up, and will simplify the recording workflow. While there is a quality ‘ceiling'
beyond which a USB microphone will not take you, it also presents very few
opportunities to go wrong.’
The ceiling that JISC Digital Media refer to consists of a number of factors. The biggest is that condensing microphones require their own pre-amplifier, the only way you get the power via a USB microphone is normally the USB port, you are then at the mercy of the quality of the power emanating from any given USB. However, most companies worth their salt build in electronics to smooth out noisy power. Its a case of try it and see - if you like what you hear, stick with it!
JISC Digital also include some audio examples in their article:
Hover over the various black markers to see which microphone they are testing (during audio playback it is possible to move the orange slider to those positions by dragging). Personally I was not impressed with the headset sound and some of the cheaper condensing microphones are a little hollow sounding (its all down to personal taste really). The Blue Yeti, certainly provides some excellent sound in the JISC Digital Media review, although its design may lead to tricky clamping and positioning of a pop-filter (it's a minor quibble).
A few examples of good USB microphones (Always check the reviews before making the final decision!):
- The Blue Yeti is a USB microphone and currently retails at around £120 (Example of an audio recording on YouTube)
- The Samson C01U Recording and Podcasting Microphone Pak is a complete solution (Less the anti-pop filter - you will need to buy this separately), it currently retails at around £140. There is an audio vocal record on the Samson website.
- The Samson Meteor Mic is not the best out there, but it's certainly worth a look based on USB connectivity sound and ease of use. This microphone currently retails at around £60. It's the cheapest but the reviews are good and examples of audio recordings using this microphone on YouTube may satisfy most peoples needs worth a listen... More details on the Samson website.
I'll quickly add that headphones such as the Sennheiser HD 202 Closed Back On-ear Stereo Headphone are relatively cheap (considering) but provide really excellent sound. If you dont like the look or design try looking through the reviews for other brands or more expensive versions. I can recommend these as I have a pair. I was also pleased to see people like Steven Spielberg using them to review audio in a recent movie review - if its good enough for him... ;)
Happy microphone hunting...
Tuesday, 26 June 2012
Learning to use Premiere Pro CS5 - 5.5
Adobe provide a number of free learning resources that most users would find helpful and even get you started, if your're a beginner. The CS5 - 5.5 versions are available via Adobe TV They take you from understanding the interface right up to collaborative projects.
Granted they are also trying to sell a brand/product but if you look past the plug some of the hints and tips are very helpful. Adobe TV work along side lynda.com, who create a number of other training materials (at a cost) They do provide examples for their training materials, its worth a look as you may find one you you are looking for... happy learning :)
Monday, 18 June 2012
Hydrographic Academy at HE STEM Workforce Development & Employability in the South West Conference

I attended a presentation for the Hydrographic Academy with HE STEM today. It was chaired by Prof Jim Griffiths (Head of the School of Geography, Earth & Environmental Sciences, University of Plymouth) and presented by Dr Richard Thain (soon to be Director, The Hydrographic Academy) His slides are available from the HE STEM site in PowerPoint format.
The rest of the team 'in attendance' were placed on a panel at the front for 20mins to an audience of some 80 persons to help answer any burning questions. It included: Tony Jenks, Luke Denner, Jon Scott and myself. We had a range of questions from student tutoring, support and choice of interface. I think we all did a very good job at answering everything successfully, after all, we know it inside out. We were warmly welcomed by Ruth Waring (HE STEM) thank you Ruth, and delighted at all the positive feedback from others. The Hydrographic Academy has indeed been a lot of hard work from a great team of people and it shows!
 Alison Austin (Placements Officer) and Carolyn Deeming (Schools Liaison Officer) set up the Plymouth University stand with all the Faculty of Science and Technology information and kindly looked after the Hydrographic Academy banner, thank you to them! They chose not to be in the picture... I did try!
The event was situated at Sandy Park grounds in Exeter, this is what it looked like outside the venue! The team even had the opportunity to briefly sit in the padded executive chairs at the top shown in the right of the picture (below) during lunch, just a shame there was no game at the time ;-)

A big thank to all the other presenters and everyone involved in making this a very enjoyable event. I think this was a superb and fitting finally to our work with HE STEM (South West) region and we were all very pleased to share our knowledge and experiences.
P.S....not quite finished with HE STEM...the Academy will also be presenting in the final HE STEM conference in Birmingham later this year.
Alison Austin (Placements Officer) and Carolyn Deeming (Schools Liaison Officer) set up the Plymouth University stand with all the Faculty of Science and Technology information and kindly looked after the Hydrographic Academy banner, thank you to them! They chose not to be in the picture... I did try!The event was situated at Sandy Park grounds in Exeter, this is what it looked like outside the venue! The team even had the opportunity to briefly sit in the padded executive chairs at the top shown in the right of the picture (below) during lunch, just a shame there was no game at the time ;-)
A big thank to all the other presenters and everyone involved in making this a very enjoyable event. I think this was a superb and fitting finally to our work with HE STEM (South West) region and we were all very pleased to share our knowledge and experiences.
P.S....not quite finished with HE STEM...the Academy will also be presenting in the final HE STEM conference in Birmingham later this year.
Friday, 15 June 2012
Mercury playback engine and NVidia cards: any difference?
I did a little test a few months back and I finally had time to upload my findings. I was asked by some colleagues if the Mercury Playback Engine utilised in NVidia graphics cards for users of Adobe Premiere CS5 or greater was actually a feature worth its money? I performed a very basic test, placing around 2.5 hours of footage from a Canon 550D camera in full HD format and with a lot of editing to boot. I thought it would be useful to test how much time it saved rendering out the footage, either with or without the engine.

The screenshot above shows both GPU-Z and task manager running with the Mercury switched off. The results are typically what I would expect, in relation to this much footage, 8 hours for a render WITHOUT mercury. In contrast it's less than 2 hours with mercury enabled (screenshot below), giving the user headroom to do other things and also get some more time to do other video projects!

Without GPU the main CPU cores are maxed out and the computer is stuttering, it was actually difficult checking email let alone anything else (not great for workflow). With Mercury enabled (GPU), smooth and sweet and only ~75% on all cores – 42% on GPU. It also uses a bit more ram in the process – understandably (12Gb is recommended).
The screenshot above shows both GPU-Z and task manager running with the Mercury switched off. The results are typically what I would expect, in relation to this much footage, 8 hours for a render WITHOUT mercury. In contrast it's less than 2 hours with mercury enabled (screenshot below), giving the user headroom to do other things and also get some more time to do other video projects!
Without GPU the main CPU cores are maxed out and the computer is stuttering, it was actually difficult checking email let alone anything else (not great for workflow). With Mercury enabled (GPU), smooth and sweet and only ~75% on all cores – 42% on GPU. It also uses a bit more ram in the process – understandably (12Gb is recommended).
As an observation (not tested in this case) I generally find that with mercury enabled, editing is wonderful, it's only 'ok' without… Users should note that only certain video effects (that can be applied to clips) are optimised for the Mercury engine, if you want a speedy editing experience, try sticking to the basic ones first (see the video from Adobe below).
Ill also add that where video has been imported in from After Affects it reverts back to processor driven encoding, have not done any real tests, but if others have I would be interested to hear their experiences particularily involving After Effects and Premiere Pro. Notably, this adobe article explains that After Effects is multi-threaded and only a few 3rd party plug-ins work with CUDA, so After Effects people will have to stick to long renders, and big CPUs rather than GPUs for the moment.
Specifications:
Mercury Playback engine performance on: i7 Viglen (Windows 7 64bit pro) with 16Gb ram, an Nvida Quadro 4000 2Gb graphics card, with 2x2 Terrabyte 7200 rpm 6Gb/s drives. Premiere Pro CS5.5 Canon 550D full HD footage.
Ill also add that where video has been imported in from After Affects it reverts back to processor driven encoding, have not done any real tests, but if others have I would be interested to hear their experiences particularily involving After Effects and Premiere Pro. Notably, this adobe article explains that After Effects is multi-threaded and only a few 3rd party plug-ins work with CUDA, so After Effects people will have to stick to long renders, and big CPUs rather than GPUs for the moment.
Specifications:
Mercury Playback engine performance on: i7 Viglen (Windows 7 64bit pro) with 16Gb ram, an Nvida Quadro 4000 2Gb graphics card, with 2x2 Terrabyte 7200 rpm 6Gb/s drives. Premiere Pro CS5.5 Canon 550D full HD footage.
Wednesday, 9 May 2012
Domains for the Hydrographic Academy
 I have been buying and setting up domains for the Hydrographic Academy (HA) this week. It was a tricky balance between, how the HA would like to see itself externally and what we are likely to use.
I also considered whether we actually need to buy monthly hosting, use University systems or free third party solutions. The later, particularly Google based products allow for free hosting and users to add their own bespoke domain. For me this was the way to go, as I have had good experiences using blogger and linking domains using CNAME has worked without fault.
How did I do it?
This process is different for whichever URL host company you use. The important bit to note is that when setting up the CNAME ensure that there is a full stop '.' at the end of the following: ghs.google.com. It is likely to misbehave or not work properly if you don't. This is actually not shown in all the guides, one of the official guides actually has this missing. Setting the "A" is straight forward with the IP addresses provided. It normally works straight away, but I would recommend setting this up with your URL host first then setting it up on the Google product 24 hours later, just to ensure that it points at the new domain properly, and to avoid weird re-directs.
The Hydrographic Academy website now has the domain name www.hydrographic-academy.co.uk pointing to our blog.
Subscribe to:
Posts (Atom)