Showing posts with label podcasting. Show all posts

Saturday, 22 March 2014

Teaching Fellowship: 'Getting Podcasting Right for Students and their Learning'

IMG_5527
Podcasting for learning
Very pleased to have been awarded a University Teaching Fellowship (Plymouth University), with colleagues from the Faculty of Science and Environment: Dr Martin Lavelle; Dr Carrie Headlam; Dr Paul Hewson and Prof David McMullan. Congratulations to you all! I look forward to working with you more closely in this very exciting fellowship.

The work will involve research and development in the use of podcasting for students in the School of Computing and Mathematics, looking specifically at what really works well for our students. We also welcome our critical friend Dr Karen Gresty (Associate Dean for the Faculty).  Implementing use of the new DLE (Digital Learning Environment) at Plymouth with Moodle as the central modular learning platform.

Tuesday, 14 August 2012

Recording environments and microphones

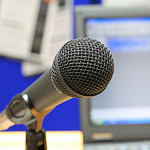
Microphone image
I get asked from time to time what microphones should I use for recording podcasts, instructional videos or simply capturing a voice during a PowerPoint presentation.  Sound is probably one of the trickier elements to get right.  If the quality of the sound is poor, then it can make listening uncomfortable or not very enjoyable for the listener.  Most mid range microphones can produce very good sound, where most of the problems originate is the environment, and how the microphone is connected to the recording equipment (in these examples - a PC).

A few considerations:
  1. Get a good microphone Don't be a cheapskate on this one... else you could spend hours of your time on re-recordings - Ill provide some more details on why later in this post.  
  2. Invest in an anti-pop filter - this gets rid of the 'puffing' sound, caused by wind movement when very close to the microphone.  A decent 6 inch one will only set you back around £12+ always check the reviews.
  3. Be consistent with your environment - different rooms will have different sound reflections - for example rooms that have more carpet are less likely to echo. Get into the habit of positioning the microphone at the same distance from your mouth. There is also a lot of noise coming from PC cooling fans, if you have a window open (next to a busy road) or noisy corridor, its often difficult to escape. Find a quiet place or even invest in a portable sound boothbuild your own or if you have a big budget, go for a Vocal Booth (which is a self contained unit with audio damping).  Yes, I know they look silly, but it helps cut out the background noise behind the microphone.  It really boils down to how seriously you take your audio.
  4. Monitor, USB mouse and Keyboard extension cables - I don't hear this mentioned often, but if you want to keep the computer noise at bay, why not get some 3-4 metre extension cables for the PC - maybe a separate monitor if you are using a laptop.   This allows you to place the microphone far enough away from noisy computer fans. (Typical PC setups will require a Monitor extension cable - a USB cable for the keyboard and and USB cable for the mouse - check the monitor plugs for the types you need.) - N.B. extending the length of your microphone lead will introduce noise - ensure you choose high quality cabling. If it reaches with the standard length it's probably best to stick with that!

What is a decent microphone?

Pop filter - they're big but work well!
For most things (voice in particular) you are likely to end up spending at least £80+ on a decent condensing microphone.  Condensing microphones capture the natural timbre in peoples voices and capture the most naturally sounding audio.  However, as most of us record via our personal computers there are a few things to consider:

  1. On-board sound card using standard (3.5mm plug) microphones - you may find that your sound card is not up to the job.  It is probably capable of fairly good sound, but can lack detail if using cheap microphones (N.B. the pros use XLR connectivity for best sound which is lacking on all standard PCs!), depending on your operating system, you also may have a battle with software volume controls and microphone boosts to get it sounding reasonable.
  2. USB microphones  - these have their own built in sound cards - typically manufacturers have developed them to compensate for noise introduced via cables etc. Be careful, as not all of these are up to the quality you may expect.
  3. Lapel microphones, you are looking at a lot of money to get professional quality sound - its a trial an error game for the cheaper ones.
  4. Mixing benches (lots of knobs and dials) - these are good if you have multiple microphone set-ups allowing users to blend sounds (and provide pre amplification for professional microphones). However you have to ensure that you have a relatively noise free USB audio adaptor to introduce clean digitised audio into your PC,  or else all the benefits you get from the microphone are lost in noise introduce at the final stages. Top end sound cards with XLR plugs may work but they are expensive and can add extra levels of complexity.  Most people just want to plug in and record with out the trouble of multiple knobs and sliders to contend with. 
  5. Omnidirectional or Unidirectional (loosely speaking 'Cardioid') microphones?  Which ones?  Omnidirectional picks up sound from every direction, whereas Unidirectional only records from one direction (the front of the microphone, typically).  Omnidirectional tend to be more sensitive and you can expect ambient noise to be collected in huge quantities, whereas most unidirectional have the specific directional properties and are typically only usable between 4-10 inches from the mouth. Because of a lack of sensitivity behind the microphones (particularly Cardioid) they are less likely to pick up external noise directly behind them (N.B. using them the wrong way round makes them sound muffled). Unidirectional (Cardioid) are likely to be the best ones for use in office spaces with a decent sound booth.  Further details on the various types of microphones available on wikipedia - its vast - only if you're interested!
JISCDigital Media have a cracking article on USB microphones, with some setting up guides, worth a look. Here are the key facts:

·         The microphone connects to the computer USB port
·         Consistent sound across different systems
·         Plug and Play installation
·         Many USB mics have a headphone jack for monitoring
·         Many USB mics are optimised for voice

‘…In many cases settings are chosen with a particular use in mind, and many are optimised for voice recording. If your intended use is compatible with this preset factory set-up, a USB microphone can save you a lot of the time and knowledge needed for correct set-up, and will simplify the recording workflow. While there is a quality ‘ceiling' beyond which a USB microphone will not take you, it also presents very few opportunities to go wrong.’

The ceiling that JISC Digital Media refer to consists of a number of factors.  The biggest is that condensing microphones require their own pre-amplifier, the only way you get the power via a USB microphone is normally the USB port, you are then at the mercy of the quality of the power emanating from any given USB.  However, most companies worth their salt build in electronics to smooth out noisy power.  Its a case of try it and see - if you like what you hear, stick with it!

JISC Digital also include some audio examples in their article:


Hover over the various black markers to see which microphone they are testing (during audio playback it is possible to move the orange slider to those positions by dragging). Personally I was not impressed with the headset sound and some of the cheaper condensing microphones are a little hollow sounding (its all down to personal taste really).  The Blue Yeti, certainly provides some excellent sound in the JISC Digital Media review, although its design may lead to tricky clamping and positioning of a pop-filter (it's a minor quibble).

A few examples of good USB microphones (Always check the reviews before making the final decision!):
Remember that all the examples of audio recording provided for these microphones will only sound as good as the headset or speakers you are using to review them!

I'll quickly add that headphones such as the Sennheiser HD 202 Closed Back On-ear Stereo Headphone are relatively cheap (considering) but provide really excellent sound. If you dont like the look or design try looking through the reviews for other brands or more expensive versions.  I can recommend these as I have a pair. I was also pleased to see people like Steven Spielberg using them to review audio in a recent movie review - if its good enough for him... ;)

Happy microphone hunting...


Wednesday, 28 September 2011

Podcast pre-labs for enhanced learning with Dr Roy Lowry

Dr Roy Lowry vodcating by foto_mania
Dr Roy Lowry vodcating, a photo by foto_mania on Flickr.

I spent a few hours this afternoon with Dr Roy Lowry, helping with the initial set up and positioning of equipment for a trial run of podcasting/vodcasting. Further details are provided in his recently awarded Teaching Fellowship, for which Dr Neil Witt and myself are listed as supporting staff. Dr Lowry wanted to not only produce a set of pre-laboratory podcasts to enhance teaching and learning, but also demonstrate how easily other teaching staff could achieve this using freely available (existing equipment) from our campus media services.

This set up includes a standard MiniDV camcorder (of course the SD card or hard drive variety can be used). To simplify recording a mini-tripod was used so both presenter and equipment could be captured consistently. The laptop was used as an auto cue, providing prompts. Footage from both apparatus and presenter would be interwoven in editing software later. A very successful first attempt...I think the pictures speak for themselves!


Wednesday, 22 December 2010

Windows Live Movie Maker 2011 for educational video creation


 I have been assisting with some geology field trials of the TurningPoint system headed by fellow Learning Technologist Sid White, and thought this would be a great opportunity to experiment with the latest FREE Windows Live Movie Maker 2011 for Windows 7 to create the video above. Users will be pleased to know that Microsoft have expanded the range of accepted video formats.  It's now a simple case of drop and drag into the work area and start editing.  All the videos used for this clip came from a Canon 550D (HD, 25fps), the files are in MOV format, but I found they easily dropped straight into the work area. The software then creates a low quality render of the video so you can then experience the video at all the stages of the editing - in real-time!

There is a very good range of transitions, some professional and other perhaps now entering the realms of clichĂ©, however, this did not detract from being able to create a fairly professional output from this software. Notably, users can only add one extra sound track, which is a bit of a limitation. I was particularly impressed with how well it handed every drag and dropped video, each could be cropped and/or copied while inside the editor, very slick.

The other excellent additions were the ability to upload directly to YouTube and also to create a DVD of your video!  I was able to output my video as a sensibly compressed WMV (Windows Media Video), which I also found I could easily upload to YouTube or the University's UpMedia area for inclusion on iTunesU.

All in all a very excellent free software package.  Could this be the Windows 7 tool of choice for making educational videos fast and efficiently amongst busy academics?  Time will tell...

Tuesday, 23 November 2010

iTunesU launched at University of Plymouth - 13 our lucky number!

Prof Wendy Purcell 
hitting the big red button!
Lawrence Stephenson,
Education Consultant, Apple UK Ltd
Opened by Prof Wendy Purcell (Vice Chancellor, University of Plymouth) who spoke of her excitement bringing iTunesU to the University.

Followed by Lawrence Stephenson, Apple's educational consultant, with a showcase of podcasts from Plymouth's own selection of uploads. Plymouth now the 13th institution to join.


Wednesday, 10 November 2010

Easy PowerPoint to Video using Office 2010

I recently downloaded a trial version of Microsoft Office 2010 to test out the features in PowerPoint as I wanted to investigate if/how easy it was to create a video with narration for teaching and learning purposes. In comparison with Office 2007 this is extremely simple to achieve. 2010 has the ability so simultaneously record a pseudo-laser pointer, narration, animations and slide timings all in one go.

Here are the steps (also demonstrated in the video below):

  • create your powerpoint as if you were taking a class (Tip: use larger fonts and images - easier for viewing on portable devices.)
  • Plug in your headset with microphone (Tip: the quality of the microphone makes all the difference).
  • Go to the Slide Show tab, then either rehearse the timing with voice or select 'Record Slide Show - Start Recording from Beginning'. Select your options in the popup then... (You are recording!)


  • Speak into the microphone and move through the pages as normal (Tip: use the mouse, as this also allows you to CTRL + left mouse click to show the laser pointer dot, as shown)
    Laser pointer dot shown next to
    'Site Feed'

  • When complete, press 'Escape' wait while it momentarily organises the data.
  • Then create the video by going to Save & Send, which is found under file menu. Select the 'Create a Video' option as shown below. Leave settings as standard, but note there are other video options depending on your needs. All done!


N.B. Don't forget to also save your presentation if you need to come back and make changes.

Microsoft have a guide on recording audio.

Watch the video of how it was done! (including sound)

View on YouTube - note that the video quality starts in standard low resolution quality, HD is also available. Use the expand button to watch full screen (the four arrows - bottom right)

New - Also available on iTunesU

Hope you find this useful...

Monday, 25 October 2010

YouTube Video Editor part 2


Thought I would throw in this quick update about the YouTube online editor. This is in addition to my previous post while in Beta testing. Users with YouTube accounts will now notice that the Video Editor tab appears at the top, rather than manually typing in the URL.

Notable changes:

  • There is no longer a limit of 7 clips.
  • There are a set of 3 simple transitions cross-fade, wipe and slide. (cross-fade is my personal favourite for a more professional touch)
  • Preview playback is extremely grainy, but the final output will be as good as the original quality.
  • Moving the preview playback slider is very dependant on network speed, typically you have to watch all the way through to see if transitions and video work...

Select image to enlarge
It's a very simple process of drop and drag, items can be easily removed by simply using the 'X' on each of the transition or video objects.  Notably adding the music will still prevent the user from downloading the MP4 file later, so if you intend using your completed file elsewhere it is preferable to add music or additional sound using an offline package later. Hopefully YouTube will add the option to upload your own sound files in the future and then allow MP4 downloads.

 The MP4 download option can be found as shown (from the 'My Videos' area):

A word of warning, if you get too carried away you may find that the Download MP4 option disappears from the drop down menu, usually it warns you that the option is 'currently not available'.  So what happens? Essentially there is a limit of two MP4 downloads per hour as described in the YouTube help, so choose your downloads well...  If you need more, just come back later...

Overall, a very handy simple, quick and free video editor that will suit most peoples requirements for simple educational videos. As YouTube also hosts your videos (for free) all videos can also be easily embedded into online resources. Thank you YouTube and keep up the good work.

Tuesday, 6 July 2010

GEES Anniversary Conference - the value of PDAs in extending fieldwork practice in the Earth Sciences

I'm currently attending the GEES Annual Conference here at Plymouth University. Where geography, earth and environmental science academics, support staff and friends come together to share best practice. It's a special occasion for the GEES subject centre, this being its 10th anniversary.

Why the image of a PDA? Well yet again TEL pervades the realms of this conference, there is a technology stream throughout. Happily I can report that the first day contains a series of field trips with a TEL theme. My colleagues Drs Mark Anderson, Meriel Fitzpatrick and I will be running the PDA (GPS) based fieldtrip to Kingsand (as detailed here), where delegates are invited to do the very same as our geology students!

Derek France is also running a parallel session (unfortunately I miss this one!) where delegates are taken on an iWalk, they will be shown various interesting parts of our city and film elements as they go. Then later create an electronic story board showing their findings. I was talking to Derek about this and he said that his students do the same thing at his end of the woods, they typically can turn out a story board using MS Movie Maker in 1.5hours! Yes you guessed it, in effect a short film/podcast.

Also in the afternoon is Dr John Maskall, Dr Paul Lunt, Dr Trevor Collins and John Lea fieldwork session to Devon Great Consuls, 'Improving accessibility to environmental science fieldwork using a portable communications network', which back in March I had the pleasure of attending their trial run.

There is so much going on at this conference regarding TEL, from Facebook to Google Earth. This should be an interesting one!

Update! - Photographs I took at the conference


Thursday, 1 July 2010

Earth's gravity podcast example

I've generally been keeping an eye (and ear) out for simple science based podcasting applications and have particularly enjoyed the sort of outputs that the BBC News online produce. I'm not talking about their high end productions but their simple use of audio, usually reinforced with images. Although most would agree that good use of descriptive audio can stand alone - we can all still learn a lot from radio broadcasting techniques - think of the plays or shows with narrators setting the scene before the characters talk... If I may point you to this recent BBC News article on Earth's gravity.

I'm being a little bias, as this was a topic I remember well from my geology classes. Did you know that earth's gravity varies across the earth surface? Those of you from disciplines that link to environmental/geological studies will of no doubt know this as the Bouguer anomalies.

I digress... Notably this articles page includes a very simple podcast from Professor Reiner Rummel, explaining the gravity map (see GRAVITY - A MOVING TARGET) OK its not called a podcast on the page, but it has all the characteristic. Essentially a typical BBC interview asking questions combined with the images. I cannot stress how simple and effective short bites of audio are for enhancing learning. Why bother? Well the beauty of using audio (only) is that it's easy to do and students are able to carry these snapshots of knowledge with them. A simple application could be an image on our tulip ('MS Sharepoint') and a link to the audio (held on iTunes U or our new UpMedia system), would you not agree this could be effective? Enjoy being creative with your favourite subject matter.

Image courtesy of ESA - GOCE High Level Processing Facility.

Thursday, 24 June 2010

YouTube Editor, how does it fair?


I created this video to demonstrate how simple short films can be made using the new YouTube Editor. Ok its a little basic, only allows 7 video clips to be included in the time frame, there are no transition effect and there is no audio editing other than an 'AudioSwap' feature that allows users to add creative commons music. For this example I only used 4 original clips taken on a Canon 550D camera that I uploaded directly from the memory card. The clips were then shortened further (using the YouTube editor cutting feature) and pieced together on the (max 7 video) time frame, its all drop and drag!

At the time of producing this, the Editor was in its early stages of development. Yes its crude, but the results are very reasonable. Unfortunately videos created in this way are not available for MP4 download, BUT, if you did not use AudioSwap the MP4 download option does appear.

I think key points to remember are:

  • Uploads can be time consuming if using slow connections.
  • The editor will currently only allow 7 separate video clips to be pieced together in the final item. Keep them short, as you are only allowed a max of 10 mins total for a 'complete' video.
  • No editing of the sound is available as yet. Although royalty free music is included and can be added by drop and drag.
  • The video created with the editor does not currently appear as something that can be re-edited.
  • Processing of your final work can take time, thankfully you can happily turn off your PC while it chugs away and view later!
  • videos created in this way (and using the AudioSwap) are not available for MP4 download, if you dont use AudioSwap, its not a problem... (N.B. and single videos that you have uploaded can be saved as an MP4 - worth knowing if you wanted a simple converter)
  • Completely FREE!!!!!!

Monday, 24 May 2010

Podcasting and Vodcasting: what's it all about?

As the University is going to introduce iTunes U, I thought it appropriate to write a piece on Podcasts and Vodcasts in preparation.

What are they?
Podcasts and Vodcasts (Video Podcast) are essentially any audio and or video media files that can be accessed on the web or loaded onto portable devices. They are typically used (in academia) to communicate factual information.

Any good for teaching and learning?
Yes, if done properly, students could listen to relevant audio and or video that link into their programmes and modules. Think of them as audio books and or video documentaries to aid and enhance learning.

What devices can play podcast and vodcasts?
Commonly termed the ('pod'-[broad]cast) were originally named after the Apple iPod. These days they can be played on most MP3 players (digital audio players), portable video devices or even mobile phones with built in player capabilities.

How do I create my own?
There is plenty of software on the web that allows users to create audio and or video content. Software however costs money, something that academia does not always have. Freely available software goes someway to solving this problem. Here is a brief list of possibilities (for MS Windows users):

Audio: Microsoft (MS) Sound Recorder (it comes with your (XP) operating system). Want more sophistication? What about Audacity (with a decent microphone simply record your voice and edit the bits out you don't like.)
Video: A webcam, camcorder or equivalent electronic device could be used to capture the video, but what next, what about the editing? How about Microsoft (MS) Movie Maker (it comes with your operating system, its free and allows simple video editing)

How do I prepare these for Podcasts or Vodcasts?
This is probably the trickiest part for most. Essentially, Podcasts created as MP3s and Vodcasts created in MP4 are compatible with iTunes. So we have two problems, the out put from MS Sound Recoder is in WAV format and MS movie maker creates files in AVI format, which is not compatible. These need to be converted into either .mov or .MP4 formats (to name a couple) which are compatible with iTunes.
I have stumbled over a simple one click solution that processes videos or audio very quickly. Im still testing this myself at the moment, so try these with care. The software is from the 'One-Click Video Converter Series' from Polaris-Software.com. Similar to other one click solutions on the web, but so far this seems to be the easiest (free) ones to use. Download either the 'Free WAV to MP3 Converter' and or 'One-Click Video to MP4 Converter', install (ignore any website pop-up adverts) Add the video file or sound (to the respective software) and select convert - it chugs away and creates an MP3 or MP4, that's it!

What about online editors? (updated content)
There are other ways to edit, YouTube includes a simple editing facility. There is also an option to set your videos to private, so you can edit in your own time. Completed videos can then be downloaded in MP4 so its in the right format for use on iTunes or even portable devices that support this format! All your editing and converting is done in a web browser, the editor is very basic but it allows simple drop and drag of each video you have uploaded, to make one single video. I think ultimately, software such as MS Movioe Maker could be used to create the video (podcast) and YouTube a way of converting to MP4.

Thursday, 5 February 2009

Dramatic Writing in Second Life

A very interesting project that utilised Second Life as a stage set for dramatic writing students. This came about from a successful Teaching Fellowship Award project developed by Becky Freeman (Faculty of Arts Learning Technologist), Anthony Caleshu, (Programme Manager for English and Creative Writing, School of Humanities) and Mark Pannell (Learning Technologist, EdaLT).

I was pleased to provide some support on the two days the sessions ran, also filming the students over the two days. ...Before you ask "but this is not a science subject?", I had my Experiential Learning CETL 'hat' on for this piece of work and it was an opportunity to work across schools with some very talented learning technologists..


The video was filmed using a Sony HDR FX1 camera, editing was carried out using Adobe Premiere CS3. CS3 is now superseded by CS4.  If you have the bandwidth, the video is best viewed in HD.

Further details on Becky Freeman's project can be found here.

I would like to thank Plymouth University Television and Broadcast Services for help and assistance, and also the Plymouth University Library Media counter for use of their editing suite.